
E-Textile Swatch Book
2023 - ongoing; a series of e-textile swatches that demonstrate different soft circuit interactions

Inspiration
This project is inspired by the e-textile online community and their dedication to documenting material discoveries (especially www.kobakant.at)!
Classrooms back to in-person learning
Previously when teaching Intro to Wearable Technology, I taught online throughout the pandemic. Students heavily relied on online documentation to follow along in their explorations.
As classrooms are now in-person, students benefit from seeing and basing their work off of real hand made examples
This work creates modular and tactile e-textile swatches for students to handle tangible examples in order to support the class work.
Ability to test new circuits
The swatches demonstrate the following analog circuits:
-
Closed
-
Parallel
-
Series
-
Open
-
Pressure resistor
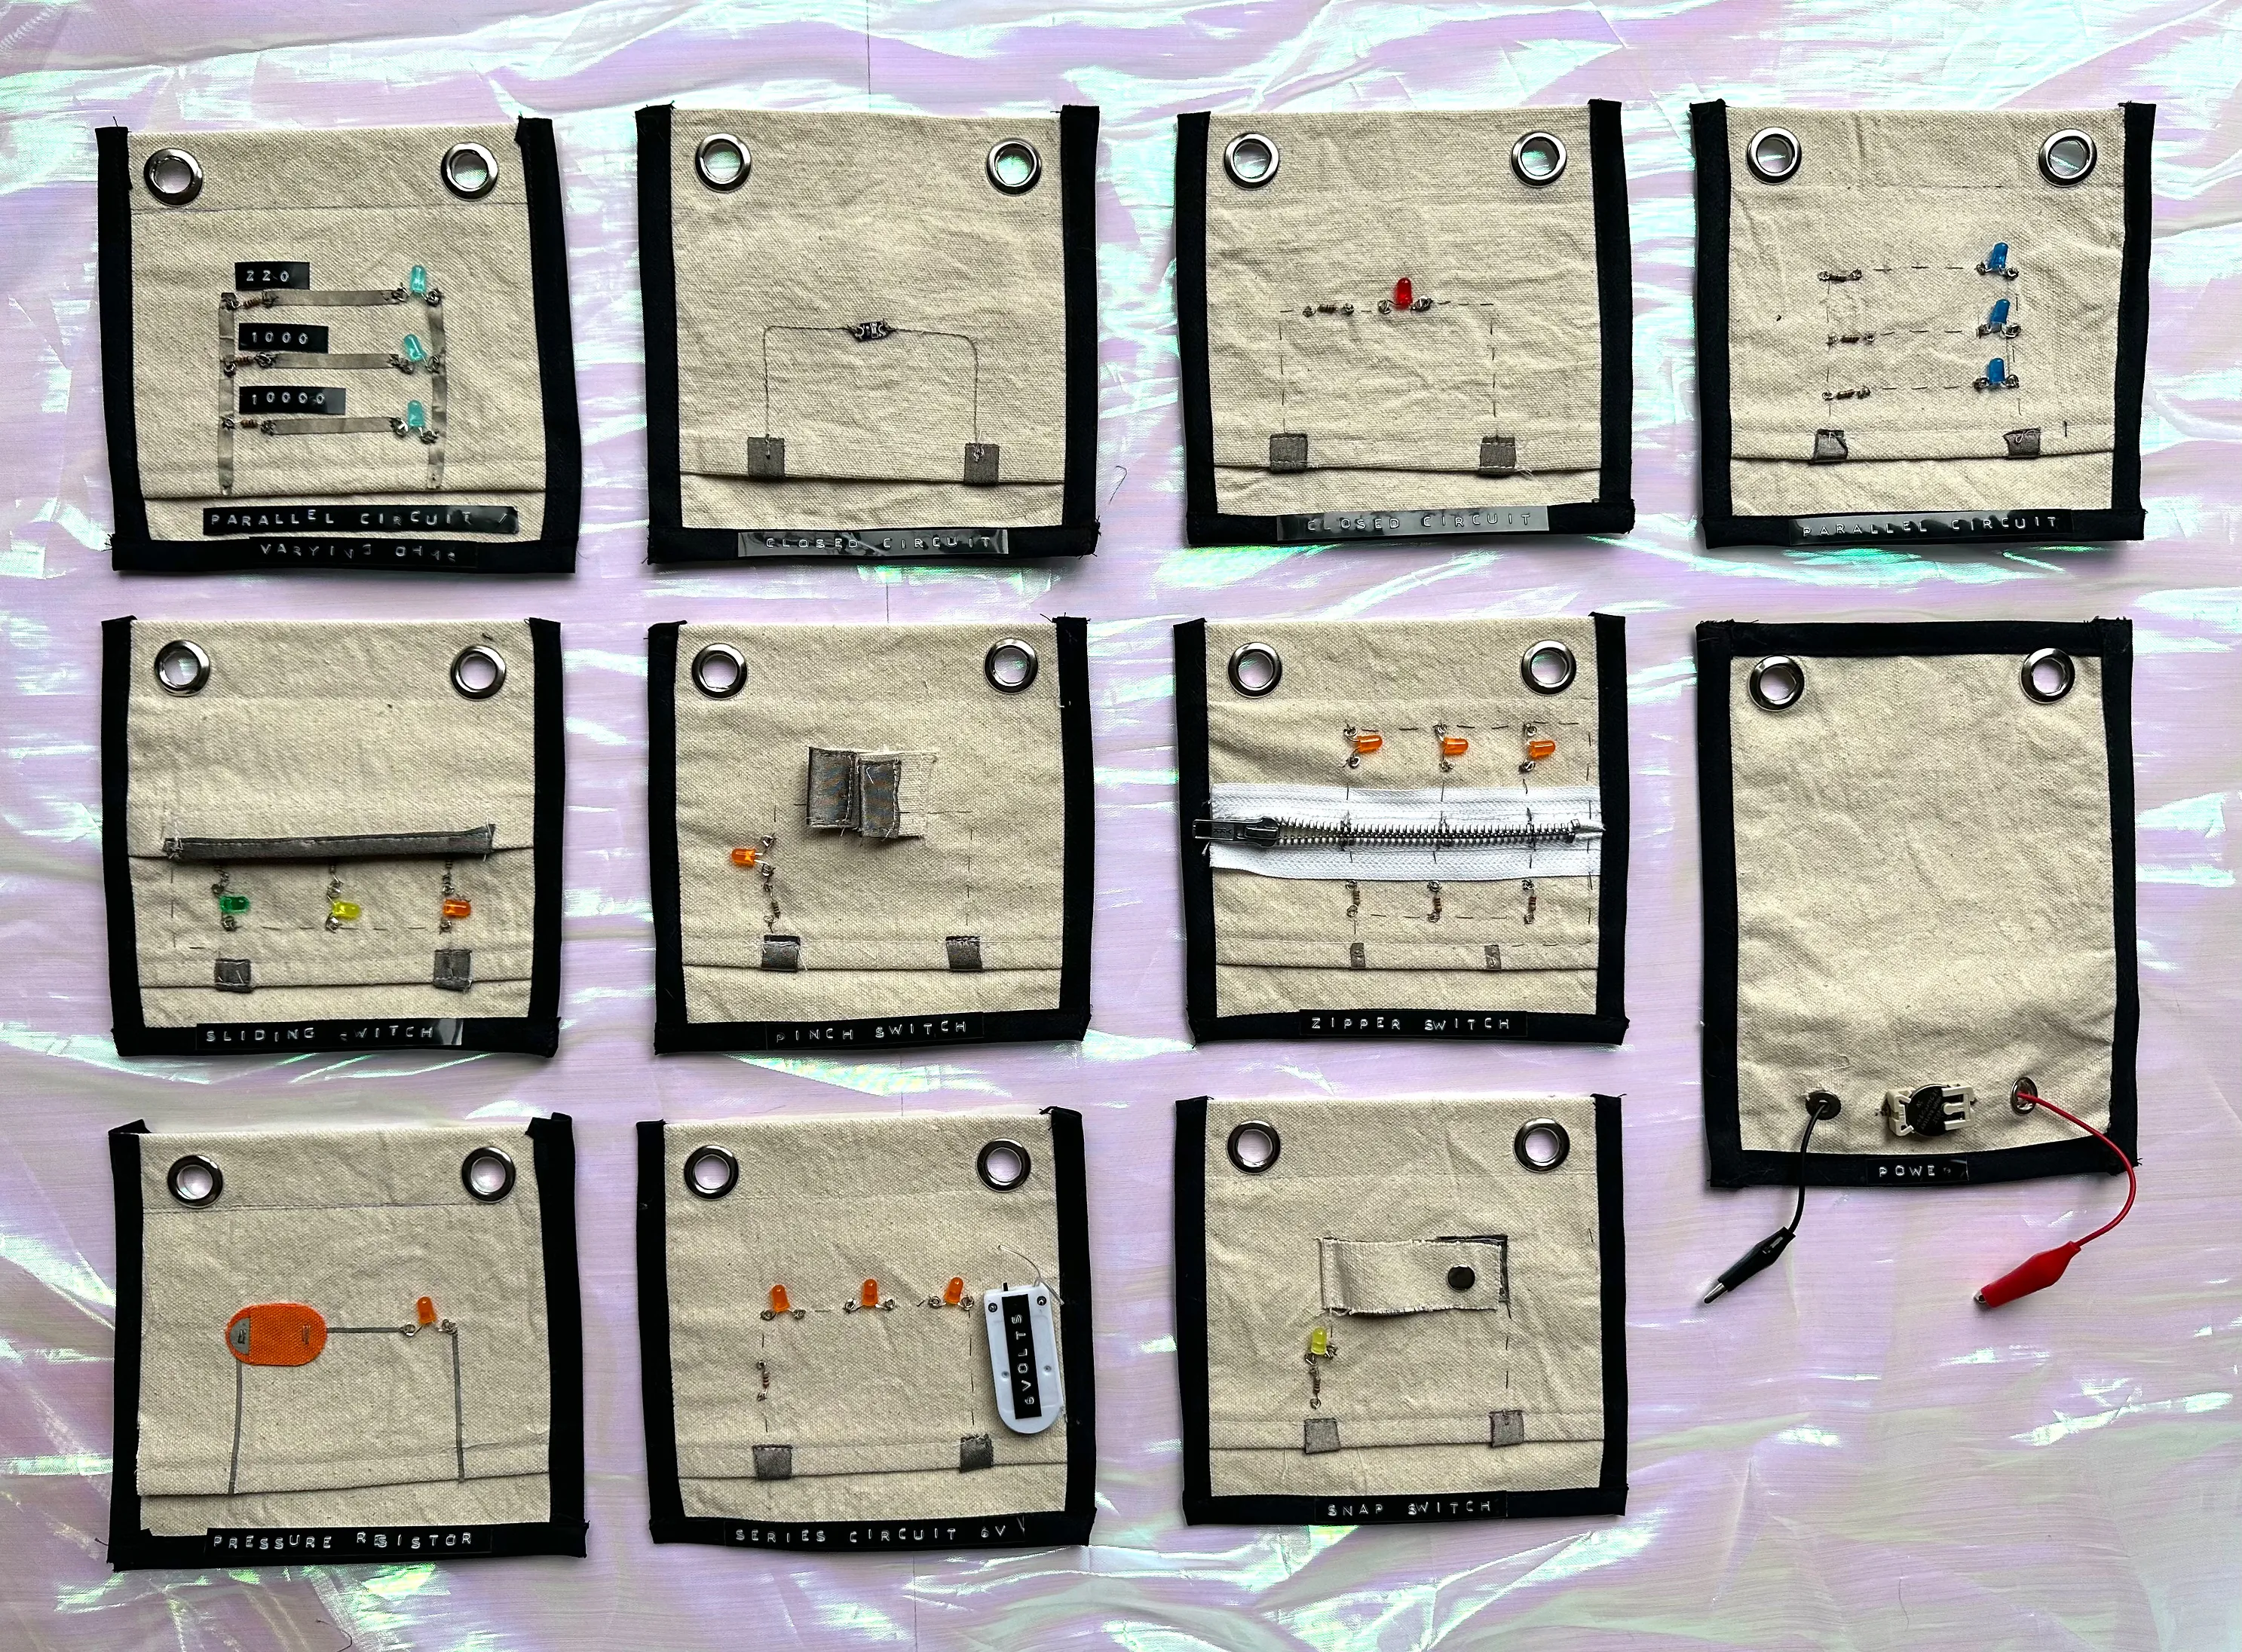
All of the swatches, unclipped from the rings, laid out for side by side comparison.
Design
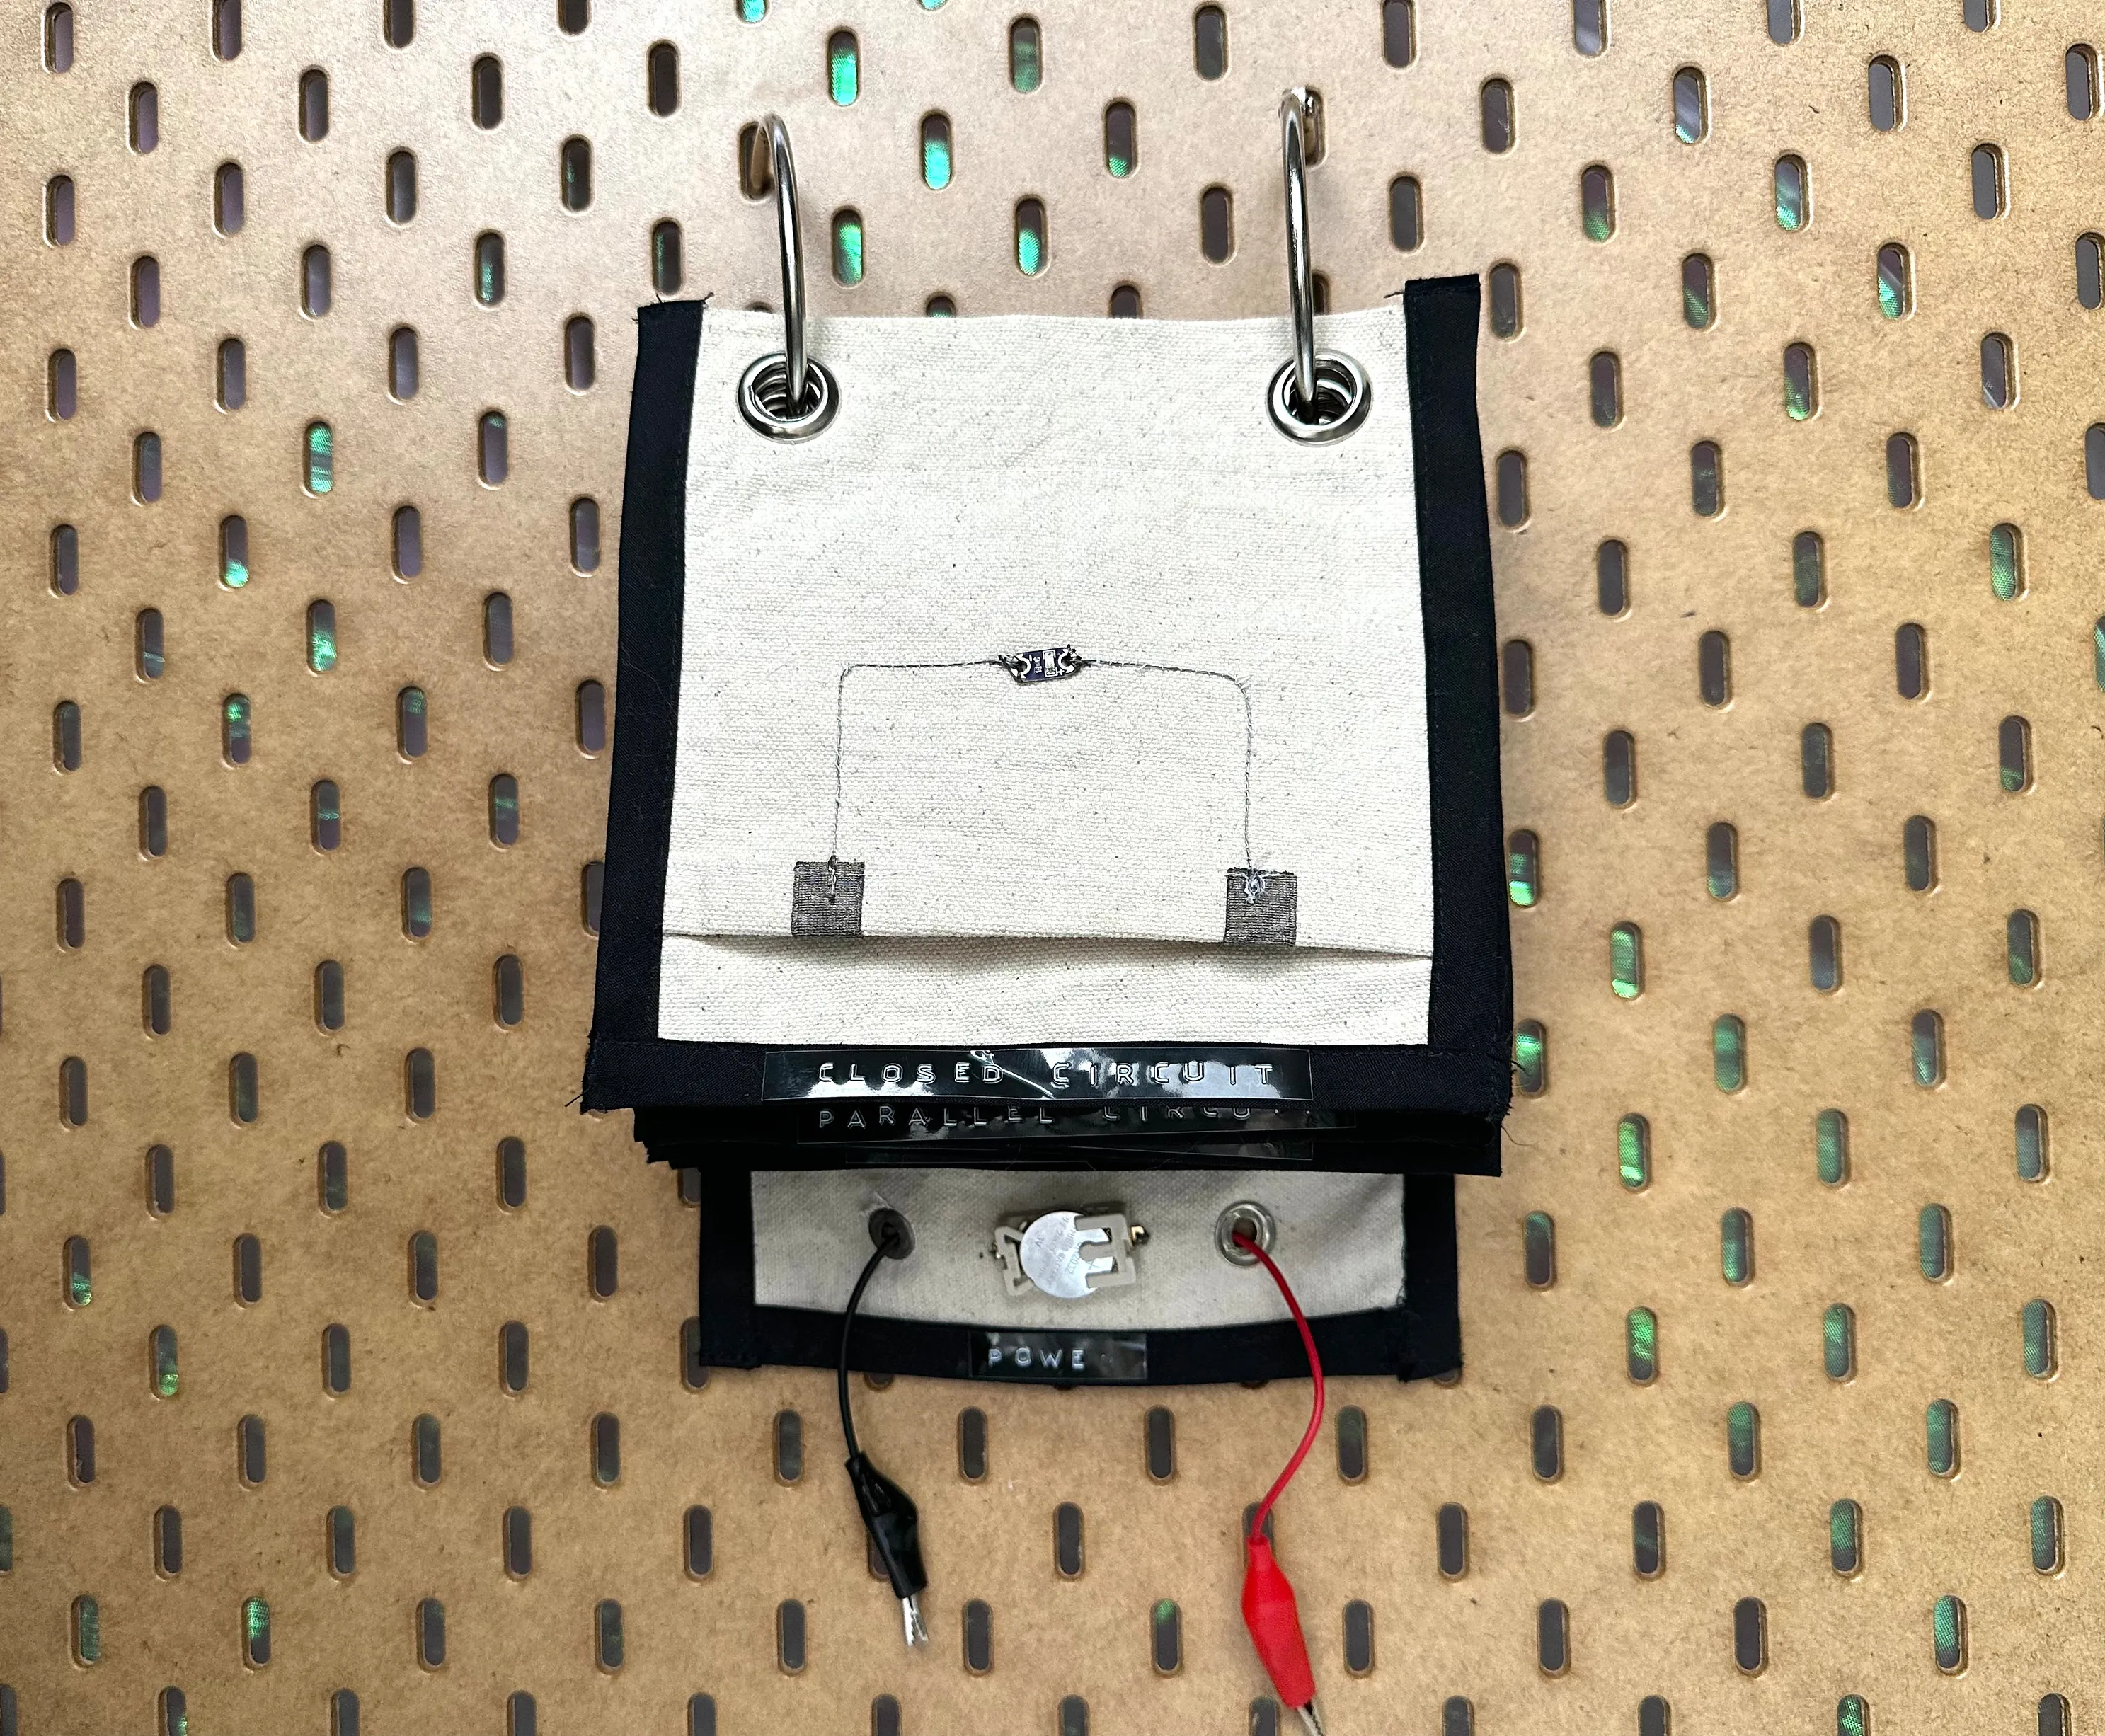
All of swatches include two grommets to are connect together with binder rings.
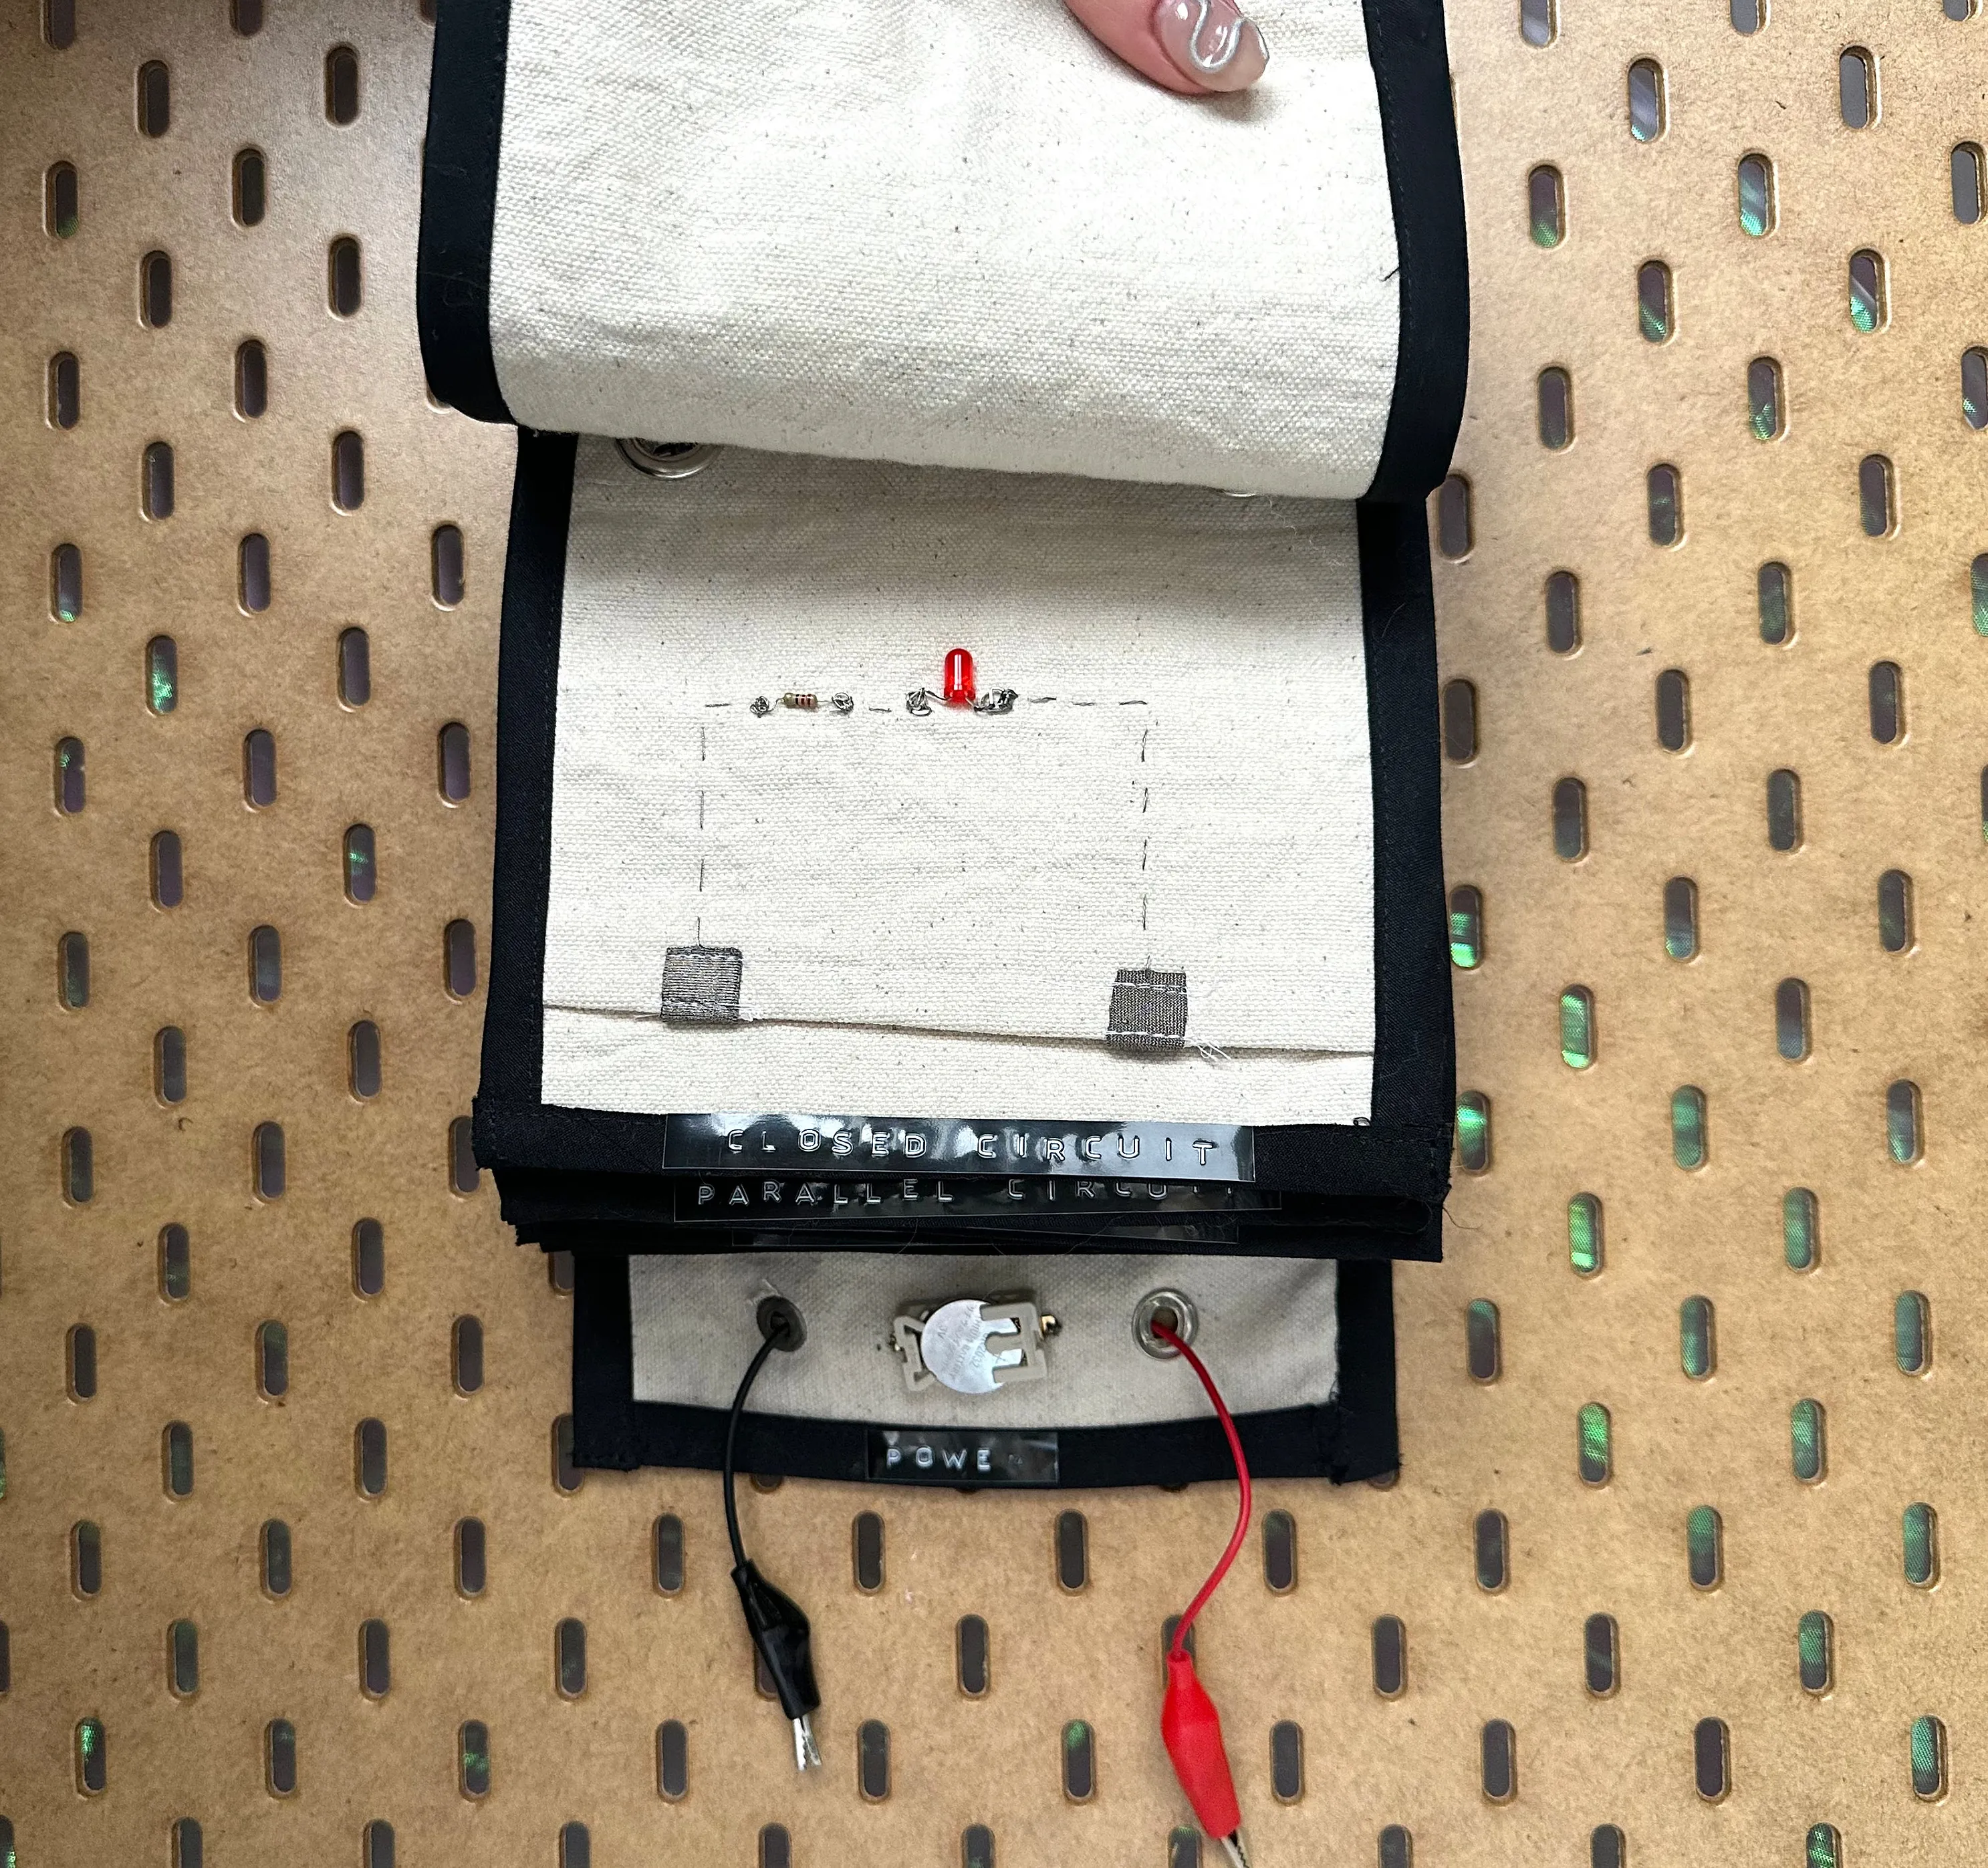
Each page is made out of folded canvas to keep each circuit isolated from the other pages.
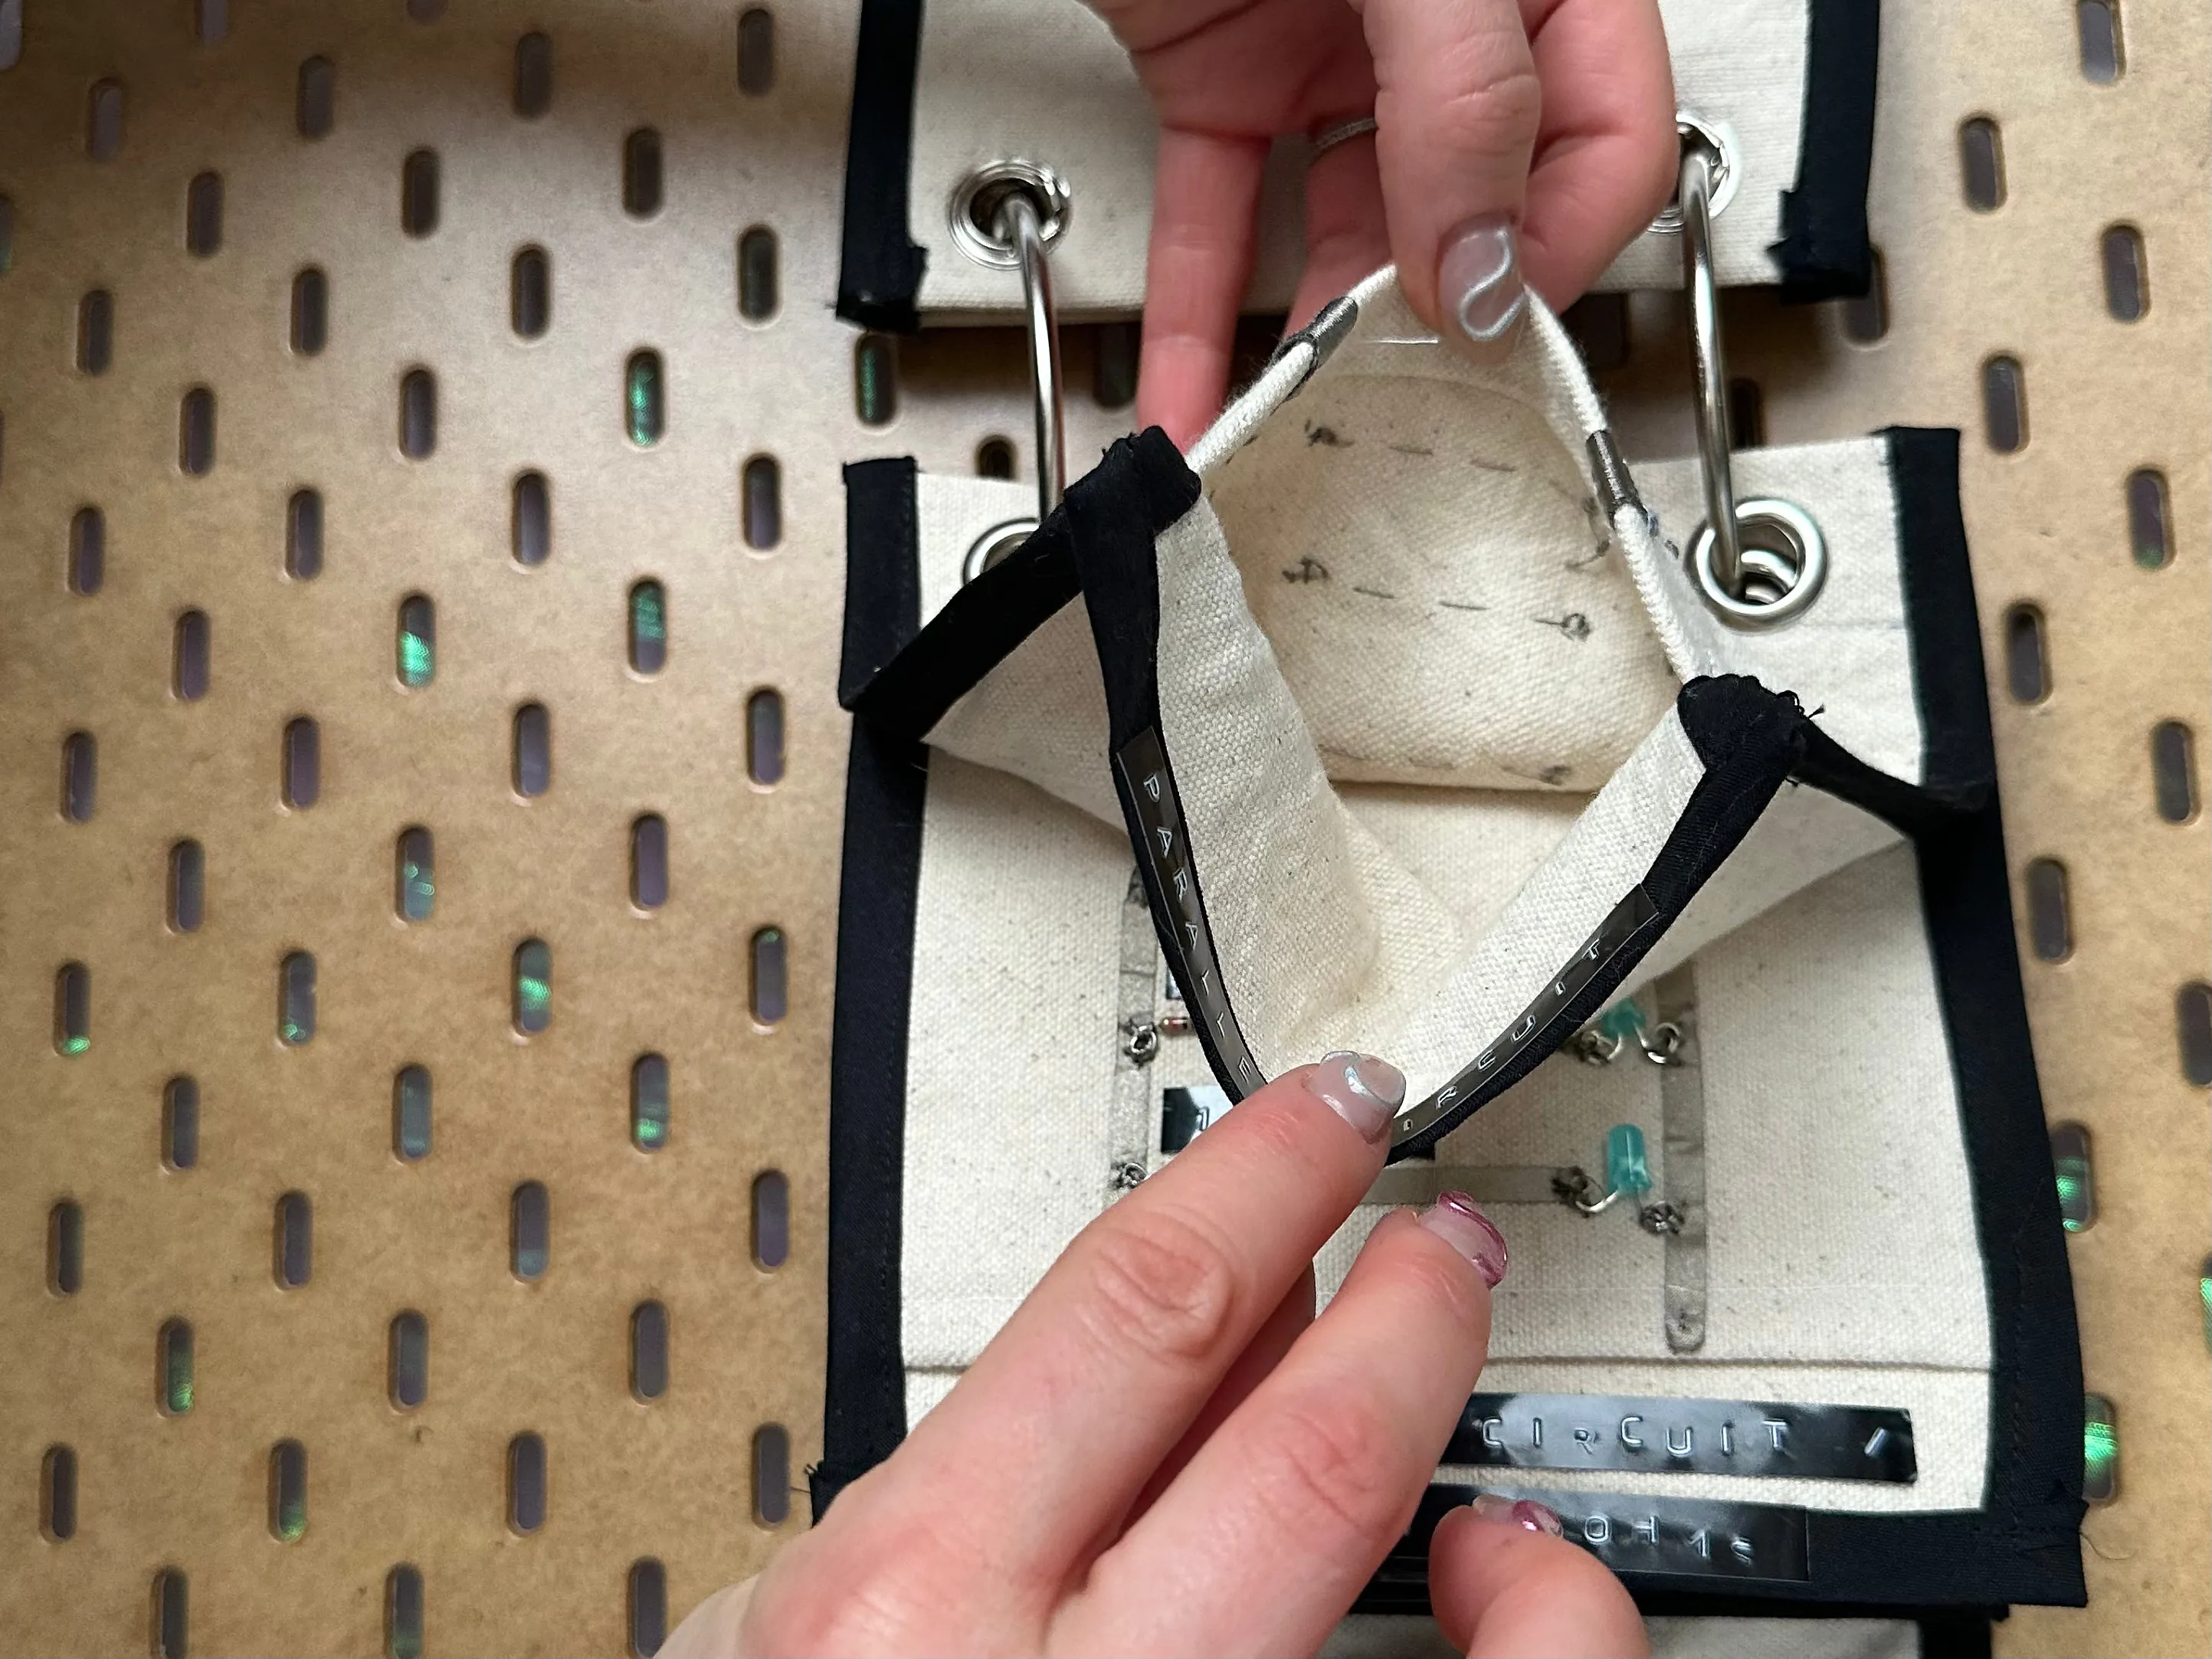
The circuit is added onto the first layer of canvas and then edges sealed with bias tape to keep all connections clean and separate.
How it works
Powering each swatch with 3V
The last page of the swatch book is the ”** power**” page that extends beyond the height of the other pages.
The page holds a 3V coin cell battery in a sewn battery holder with t** wo alligator clips soldered** on.
The alligator clips are fed through the front side with grommets for easy no hassle access to the power source.
Demonstrating each swatch
Each swatch has two pieces of conductive fabric in the middle edge of the first layer of canvas.
The alligator clips can either power the swatches by making contact or clipping onto the conductive fabric.
(Swatch to the right is a closed circuit using a sewable “sequin” LED.)
Closed Circuit (Single LED)
Circuit demonstrates how to connect a standard 5mm LED and resistor to conductive thread:
1 x 5mm LED1 x 220 resistorConductive thread
*** compression quality impacts the brightness of the red LED in the documentation***
Two Parallel Circuits Swatches
First circuit demonstrates how to sew a parallel circuit**:**
3 x 5mm LEDs in parallel****3 x 220ohm resistor (for each LED)Conductive thread
Second circuit demonstrates that more resistance impacts LED brightness:
3 x 5mm LEDs in parallel, each with a different resistor****LED 1 uses a 220 ohm resistorLED 2 uses a 1k ohm resistorLED 3 uses a 10k ohm resistorConductive thread
Series Circuit (Single LED)
Circuit demonstrates how adding LEDs in series requires greater voltage to activate the LED.
3 x 5mm LED1 x 220 resistor2 x 3V batteries Conductive thread
Open Circuit - Pinch Switch
Circuit demonstrates how to close an open circuit using conductive fabric through a ”** pinch**” interaction.
1 x 5mm LED1 x 220 resistorConductive fabricConductive thread
Open Circuit - Snap Switch
Circuit demonstrates how to close an open circuit through the use of metal snaps and conductive fabric.
1 x 5mm LED1 x 220 resistorMetal snaps Conductive fabricConductive thread
*** compression quality impacts the brightness of the yellow LED in the documentation***
Open Circuit - Sliding Switch
** Multi LED
Circuit demonstrates how to add multiple LEDS in an open circuit using conductive fabric as the common ground.
3 x 5mm LED3 x 220 resistorConductive fabricConductive thread
*** compression quality impacts the brightness of the first green LED in the documentation***
Open Circuit - Zipper Switch
** Multi LED
Circuit demonstrates how to add multiple LEDS in an open circuit using a zipper with conductive thread.
The conductive thread is in between the zipper teeth which connects the the common ground to the LEDs once zipped.
3 x 5mm LED3 x 220 resistorZipperConductive thread
*** compression quality impacts the brightness of the first green LED in the documentation***
Closed circuit - Analog Resistor
Circuit demonstrates how to add a variable resistor to change the brightness of an LED.
The variable resistor created here is a pressure sensor made out of conductive fabric and velostat.
1 x 5mm LEDVelostatConductive fabric Conductive thread
*** compression quality impacts the brightness of the first green LED in the documentation***
Next Steps
More Interactions & More E-Textiles
These swatches show the basic circuits (closed, open, series, & parallel) and how to mix & match them with e-textile interactions.
For the next semester I want to prepare more samples that explore other common e-textile interactions, such as foam buttons, and knit stretch sensors.
I want to include more examples of variable resistors such as e-textile potentiometers, and conductive rubber.
Additionally I want to use these swatches to also demonstrate more “hard to soft” connections, such as photocells and protoboard.